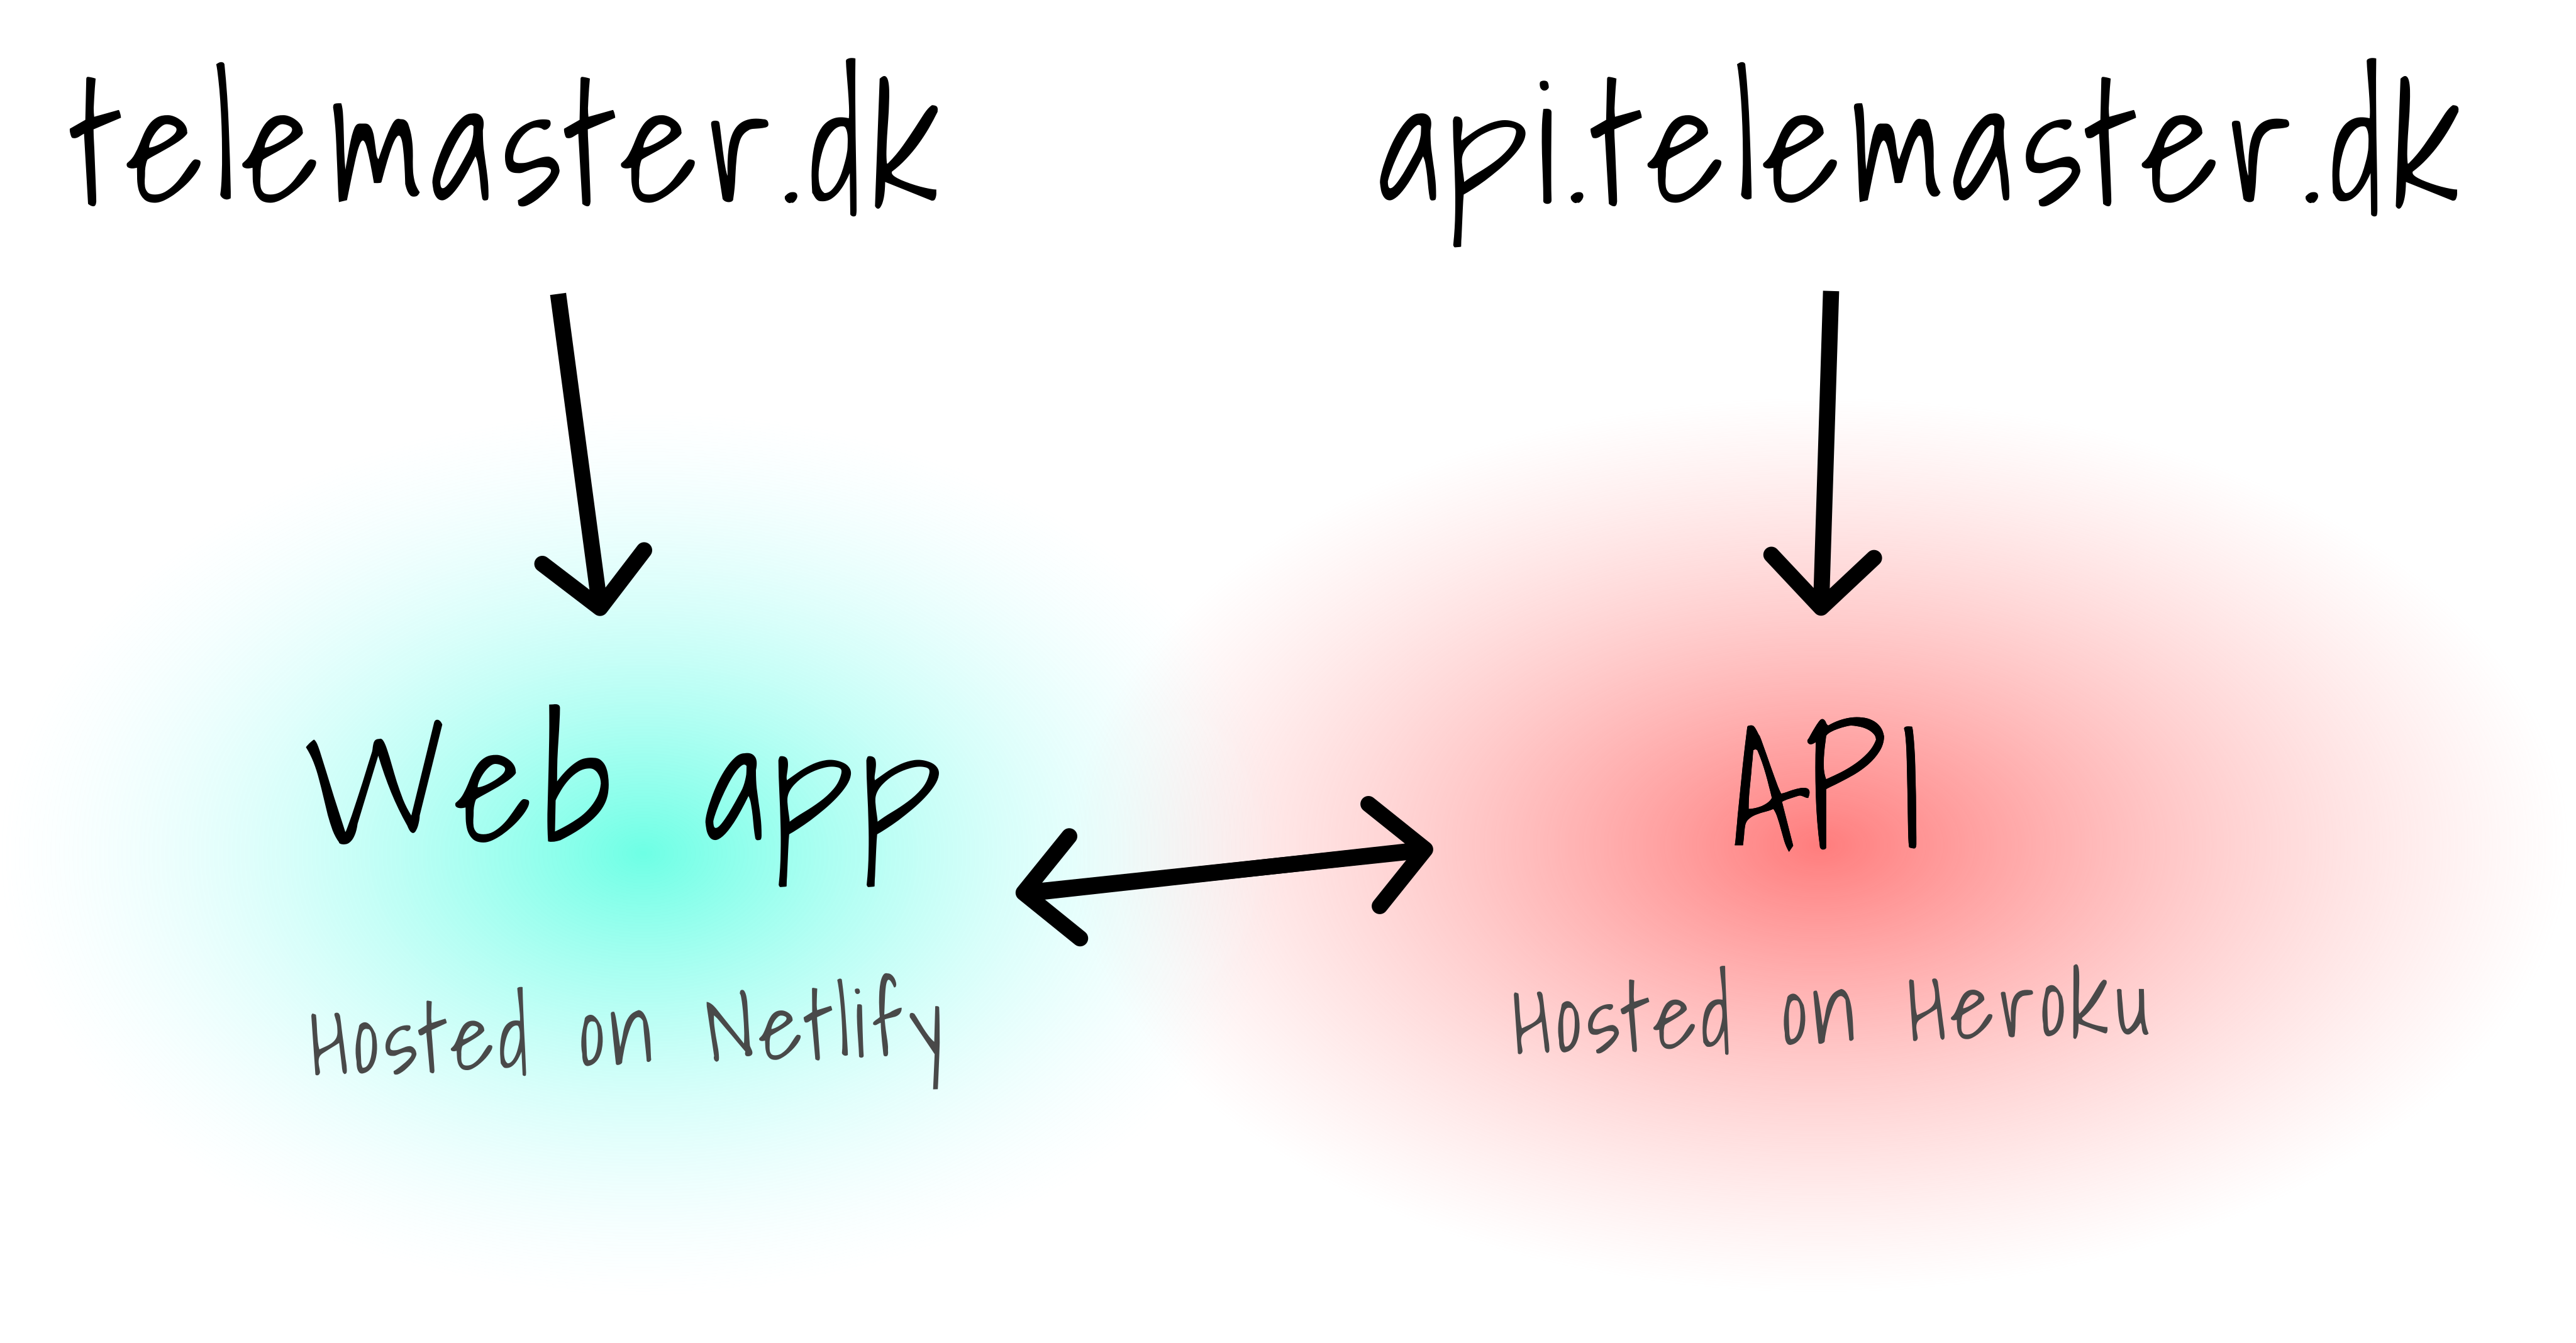
Recently I built a web application where the website itself is hosted on Netlify and the API, that the website utilises, is hosted on Heroku.
Here is the configuration I wanted:
TL;DR
- Add an
Arecord for@pointing to Netlify’s main load balancer, i.e.104.198.14.52. - Add a
CNAMErecord forwwwpointing to the subdomain generated by Netlify, e.g.telemaster.netlify.app. - Add a
CNAMErecord forapipointing to the DNS Target of the API hosted on Heroku. You can generate a DNS Target under Settings of the given application.
Initial Setup
Before doing any of the following I configured the domain namerservers to be those of Cloudflare, so that I could manage everything in there. You can find out how to do that here.
Using Cloudflare also has the advantage of lowering your bandwidth usage on Netlify, as their CDN will cache your website. Additionally, your site and API will be protected from DDoS attacks.
Configuring Netlify
Okay, so what we want is the root domain to point to the website hosted on Netlify. Netlify themselves suggest that you do the following:
-
Make a
CNAMErecord forwwwpointing to the subdomain generated on Netlify, e.g.telemaster.netlify.app.
-
Configure the root domain,
@, to point to the Netlify’s main load balancer. At the time of writing this is104.198.14.52.
This technique is used as the root domain must be an A record which must point to an IP directly. But wait a minute how does the root domain work then? Well, Netlify’s load balancer will automatically handle the redirect internally.
Now you’re able to go to both www.<insert your domain> as well as <insert your domain> and be served the website that you have hosted on Netlify. Kudos.
Configuring Heroku
Without further ado, here are the steps:
-
Go to your Heroku app that you wish to point the domain to.
-
Go to Settings.
-
Under Domains click ‘Add domain’ and then enter the domain name you wish to point to it, in our example it is
api.telemaster.dk. -
After this Heroku will present you with a DNS Target, in my case it was
opaque-daikon-3cuwxan648wxwo2vjbx5lvpb.herokudns.com. Copy that as you’re going to need it for a newCNAMErecord. -
Go back to Cloudflare and create a new
CNAMErecord with the DNS Target.
And that’s it. You’re all done. Good job buddy 👍.